Instructions
You can find the links to all the pages of this app in the menu, which can be revealed by clicking the hamburger icon (three horizontal lines) in the top right of the screen.
You can find the links to all the pages of this app in the menu, which is in the yellow panel on the right hand side of the screen.
The instructions for each activity can be revealed by clicking the relevant heading below.
To allow this web app to access your location, you will need to allow location services both in
your device settings and in your browser settings.
This is different for each device and browser, so please search online for instructions on how to do this.
For example, if you are using an iPhone with Safari, you can search for:
How to allow location services on my iPhone and Safari.
Or if you are using a Samsung Galaxy with Chrome, you can search for:
How to allow location services on my Samsung Galaxy and Chrome.
In the menu, click Add Report.
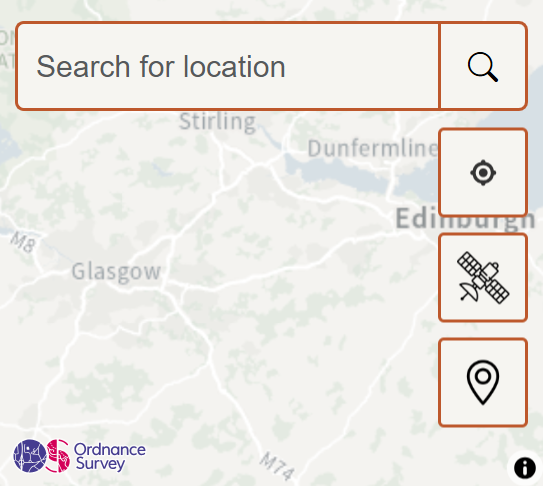
A map will load, as shown below. The first time it loads, you will need to allow the app to access your location.
If you do not allow this, the map will be centred on the UK. You can zoom to your current location at any time by clicking
the crosshair button
 .
.
You can toggle between this map view and satellite view by clicking the toggle satellite view button

When in satellite view, the button turns orange.

Find your dropped kerb on the map
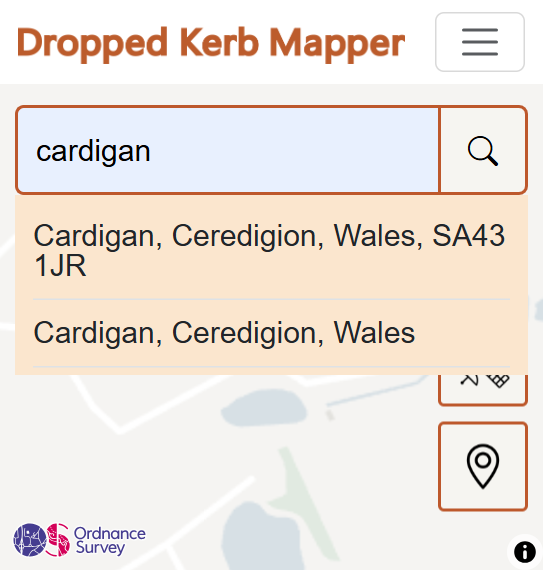
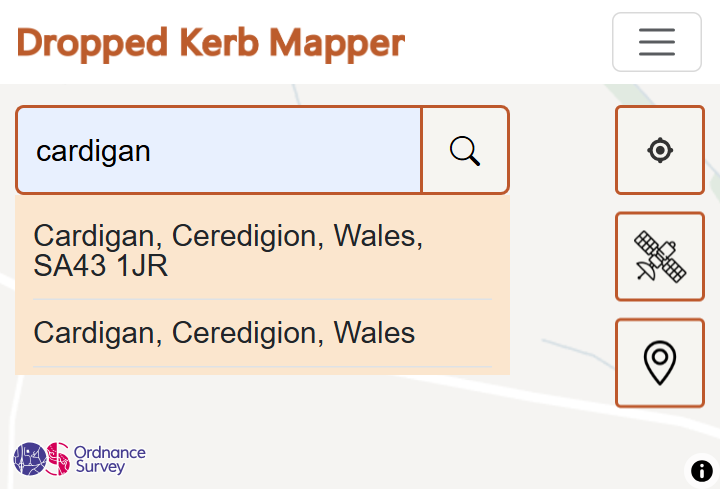
To search for a location, you can use the search bar in the top left of the map.
Type a place or location in the search bar, and then click the search button
 .
A list of search results will appear below the search bar, and you can select one of them to centre the map on that location.
.
A list of search results will appear below the search bar, and you can select one of them to centre the map on that location.
You can also navigate to a location by moving the map around as follows:
On mobile devices:
- Drag your finger on the map to move it around (pan).
- Use two fingers to pinch to zoom in and out.
On desktop computers and laptops:
- Click on the map and drag it to move it around (pan).
- To zoom in and out, you can either:
- Use the scroll wheel on your mouse.
- If you have a touchpad, use two fingers to pinch to zoom in and out.
- Press Ctrl and + to zoom in, and Ctrl and - to zoom out.
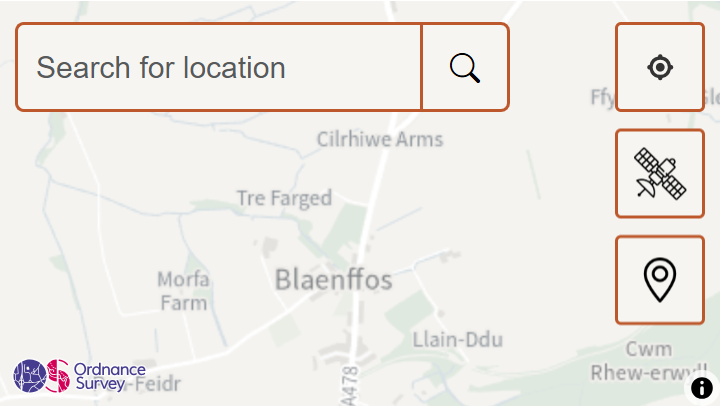
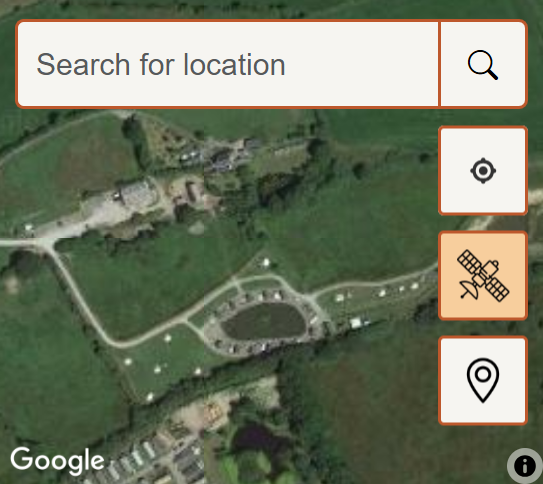
Toggle between the map-view and satellite view to help you locate the dropped kerb.
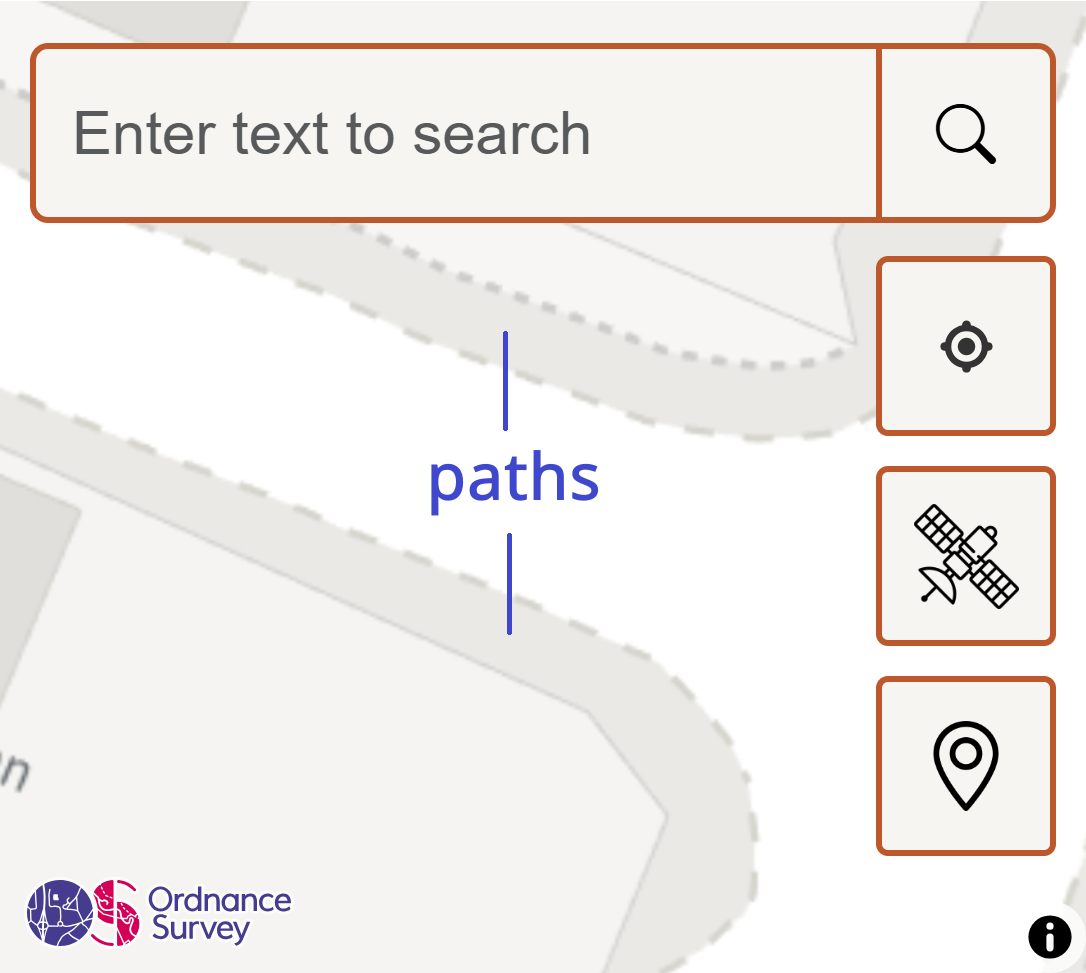
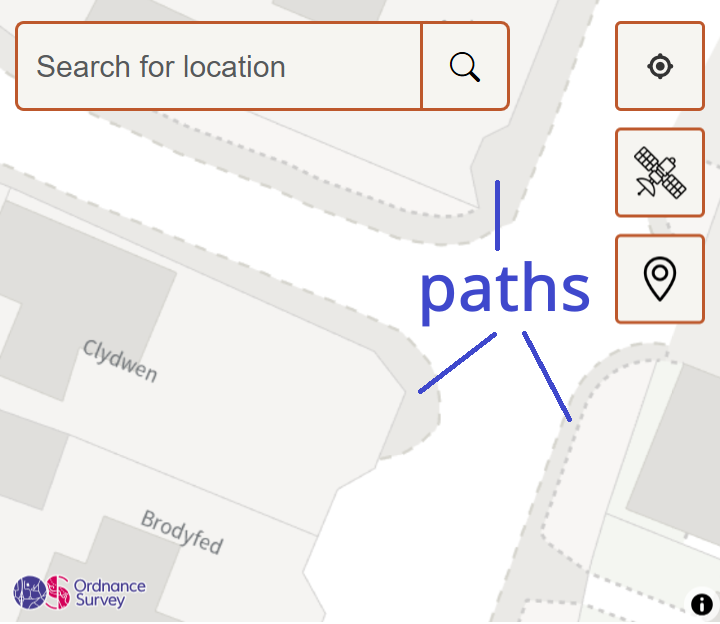
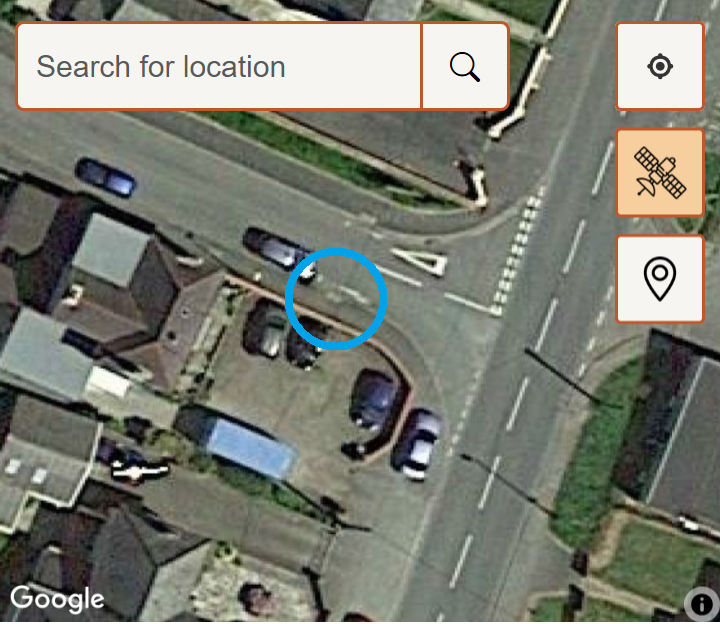
Notice that if you zoom right in in map-view you can see the outlines of paths. Paths are shown in grey, with a dotted line where they meet the road (see the map-view image below for an example).
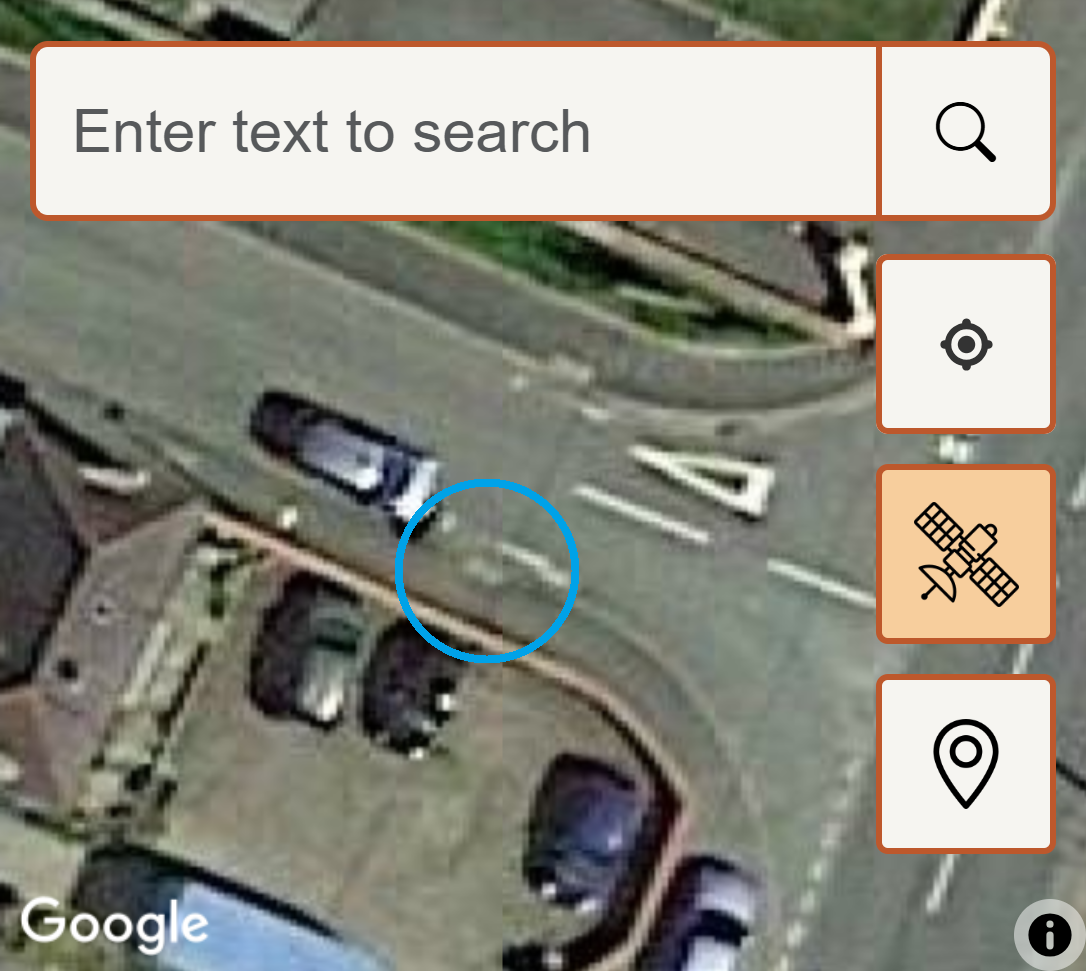
Toggle to satellite view to zone in on the location of the dropped kerb. Even if the dropped kerb is blurry, or hidden by a tree, the satellite view can provide additional visual information to help you find it (see the satellite-view image below for an example, a dropped kerb is circled in blue).
Activate new report mode
Now you have found your dropped kerb on the map, click on the map marker button
 to activate new report mode.
The button will turn orange
 and your cursor will turn into a big blue cross
which means you can now click on the location of the dropped kerb on the map.
and your cursor will turn into a big blue cross
which means you can now click on the location of the dropped kerb on the map.
Create the new report
Click on the location of the dropped kerb on the map. A yellow marker will appear where you clicked, and an orange form will open on bottom left of the screen. If you click on the map again while the form is open, the marker will move to the new location, and the form will update to show the new location, as given by the longitude and latitude.
If you would like to record the condition of the dropped kerb, you can select from three options:
- Green: The dropped kerb is usable and in good condition.
- Orange: The dropped kerb is usable but needs improvement.
- Red: The dropped kerb is dangerous or not usable.
If you select either Orange or Red, please select at least one reason why. You many also leave a comment to further clarify your reason for selecting the condition.
You can also report locations where there is no dropped kerb, but one is needed to provide access.
To do this, select the condition 'White' in the form, and add a brief comment below to explain why you think there should be a dropped kerb there.
If you would like to add a photo of the dropped kerb, you can do so by clicking the 'Choose File' button. This will open a file browser, where you can select a photo from your device. The photo will be uploaded when you submit the report.
When you are happy with the report, click the 'Submit' button. The report will be submitted and the marker will turn the same colour as the condition you selected. You will also see a message confirming that the report has been submitted.

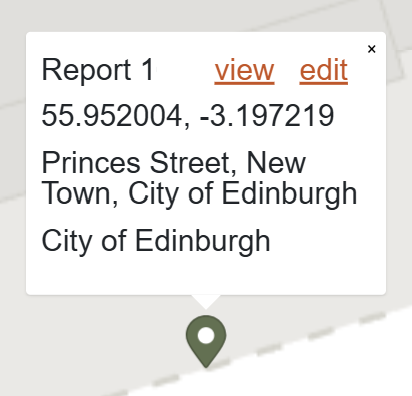
You can now click on the marker to see the details of the report on a popup. The popup also contains a link to the view report page, where you can see the full details of the report, and a link to the edit report page, where you can change any details of the report.
To close the popup, click anywhere on the map.
You can see all your reports on the map, and you can also see them in a list, as descibed in the next section.
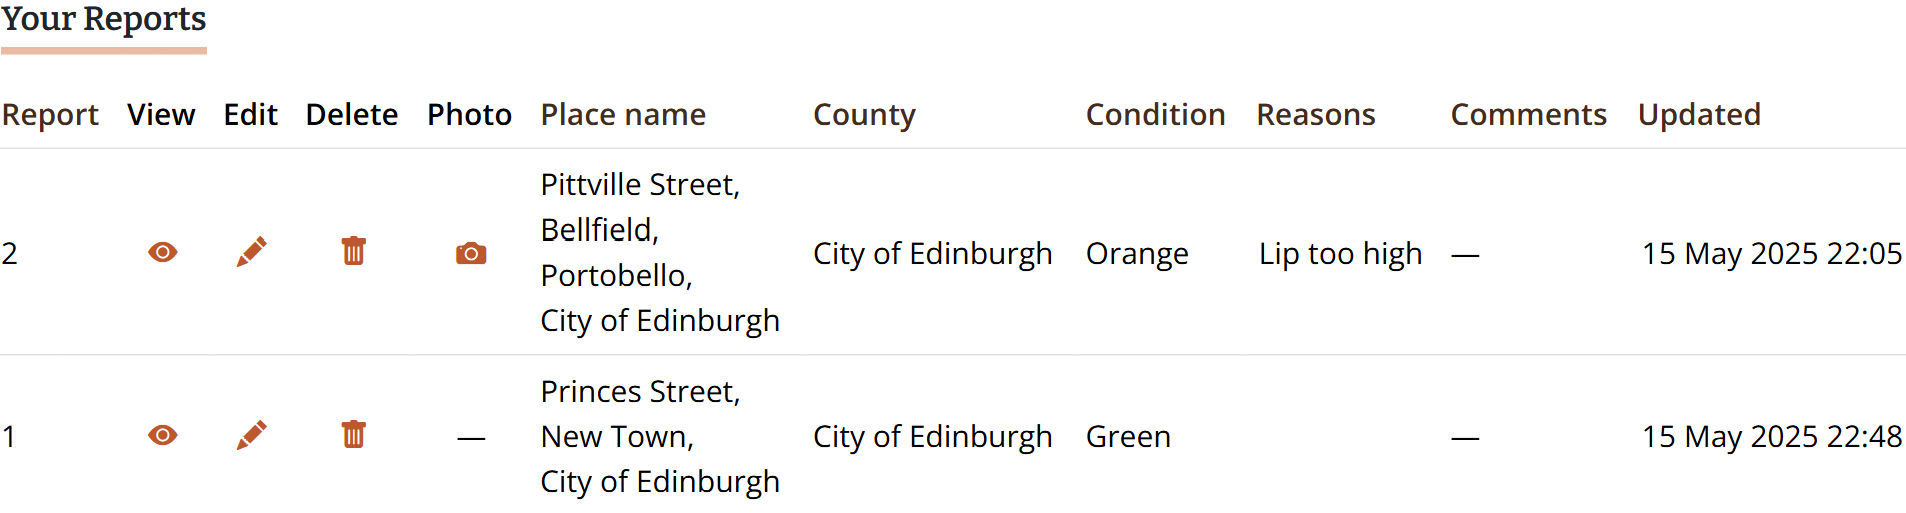
To view a list of your reports click List Reports in the menu. Here you can see all your submitted reports in a list. You can click the view icon to view the full details of the report, the edit icon to edit it, or the delete icon to delete it.
Click the photo icon to preview the photo you uploaded with the report.
If you're on a mobile device or a small screen, you can scroll to the right to see the rest of the columns.
There are two ways to edit a report:
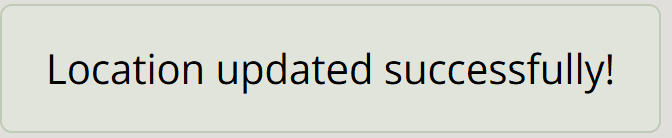
If you want to adjust the report location you can simply drag its marker on the map (Add Report page). First, double click on the marker and it will turn purple, then you can drag it to a different location. When you let go of the marker it will return to its original colour and the report will be updated with the new location. A message will appear confirming that the report has been updated.
If you want to change any other element of the report, you can do so on the edit report page. This can be accessed either:
- On the map, (single) click on the marker to open a popup, which contains a link to the edit report page.
- Click the List Reports link in the menu to display a list of all your reports, and click the edit icon . If you want to delete the report you can click the delete icon instead.
If you have any questions, please message us using the Contact page.